First Picture
The interior was purty ratty, I would say probably the condition of an average 82 chevy pickup that hasn't been restored. Examples- ripped seat with a Santa Fe seat cover, cracked dash with a carpet dash cover, the headliner was gone (fortunately the headliner trim is all there and in good shape), The carpet was stained, faded and shredded.
I started this project in the cab for three reasons. Firstly, That was the ugliest part of the truck. Numero two, It's the easiest/cheapest/fastest place to change the looks of the truck. And threely, I will enjoy a new interior more than, say, a smoothed tailgate or shaved door handles, on my Saturday night dates with my wife (note- even though it's a two seater, with hints of red, and I can see my midlife crisis in the distance, I did mention my wife and dates together, favorably, in the same sentence. I just wanted that noted...).
I've decided to keep the interior mostly stock, but change the color to red. I think stock is a good foundation to build on. I will be adding custom touches after phase one. Some of the goodies I plan to add are: An audiophile level stereo system- Denon head unit, Butler tube amps, custom component speakers from Robot Underground. I will soon start collecting curly maple to build dash and door inserts, and will attempt a cherry sunburst finish with ivory binding and mother of pearl inlays, reminiscent of electric guitars. I will build a floor center console that flows into the dash. It will cover up the ash tray and dual tank switch hole(I'm going with a single tank in rear/center). I also plan on installing a billet steering wheel.
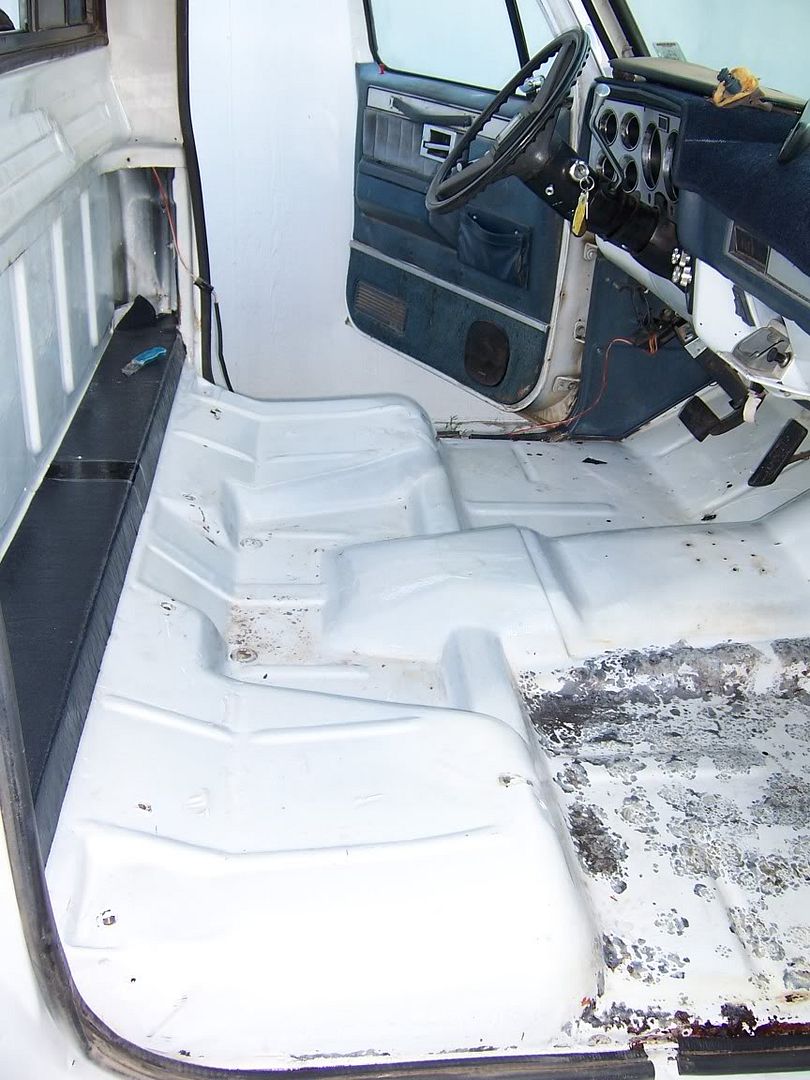
I am sound deadening now. I started by tearing out everything but the dash and steering wheel. I cleaned the metal thoroughly. The passenger side floor (see picture) was lightly rusted. I fixed that by wire brushing and painting on a commercial rust converter. Next I brushed geocel 2310 (a tripolymer roof sealant) on the floor, back wall and ceiling. It will waterproof, add mass to the sheetmetal, and it's a good base for the ice and water shield (a rubberized asphalt membrane) that I am putting down next. I have read forums and how to's on sound deadening, and have come to the conclusion that the products on the market (dynamat etc.) are no better than what is out there for the roofing industry. I bought a 400 sq.ft.roll of sticky backed ice and water shield for $67.00. If the idea is to deaden the road noise, and the bright ringy sound of sheet metal, I have done that. Anywhere that there is space between the outer and inner sheetmetal I have filled with polyfill (pillow stuffing). Don't use a cotton fill, because it will absorb water and rust out them durn cab corners, and everyone knows that a chevy pickup will jump at any excuse to rust (Note all my attempts at water proofing). I'm happy with how it's going so far, and hope to put carpet in tomorrow. I will leave the back wall carpet-less for now, and will install a built in speaker/amp box later. I bought the carpet at Classic Parts,the sound deadening goodies at ABC Supply in Dallas. and a vinyl dye called ColorBond at LMC Truck . I am going to experiment with the ColorBond tomorrow. I'll be attempting to turn blue vinyl and plastic parts into red.
Parting note- My goal is to have fun with this project. I'm enjoying the process. I realize I'm reinventing the wheel in some areas, I could just buy ready made sound deadeners and be done with it, but that's not me. When the cab's all covered up with carpet and headliner, no one else will know the work I've put into it, but I will.......
posted by Grade 8 Nut at 10:00 PM
![]()

0 Comments:
Post a Comment
<< Home